Friday, December 31, 2010

How to Support a Compassion International Child on Mininum Wage

Learn more about sponsoring a child.

We have three boys living in our home but in our hearts we are a family of six.  We have a five year old little boy who lives in Kenya with his parents named Nyamawi who, like our three natural born children, was born in July.  After following MckMama through Kenya, through much prayer and buckets of tears, our little family gathered around the computer screen last spring and hand-picked Nyamawi.    

Every month we send a small amount of money that helps to give Nyamawi the opportunity to hear and know the Gospel and learn about Jesus Christ, regular Christian training; educational opportunities and help; health care, hygiene training and supplementary food if necessary; a caring and safe Christian environment to grow in self-confidence and social skills; personal attention, guidance and love.  We send letters with photographs, hand drawn pictures, stickers, and band-aids.

What we get in return is far greater than what we give - heartfelt letters with the most adorable pictures.  I don't understand all what he is writing most of the time (even after it's been translated) but I get so excited when I see the envelope and tears fill my eyes as I read his letters.  We sent a small amount of extra money for his birthday present and Compassion bought him a goat for his birthday.  I pray that the little goat is teaching him valuable skills that he can use later in life.

Don't think you can sponsor a child with Compassion?  You don't have to, there are numerous other worthy organizations to donate to.  But Compassion does have a stellar financial record with only 17.3% of donations going to supporting expenses and only 9.7% of that going to administration.  That is really unheard of for international organizations of this magnitude.

Plain and simple Mr. Steady doesn't make much more than minimum wage.  I'm not saying that to make you feel sorry for us or to put us on any kind of pedestal, for sure and for certain.  We know that we are exactly where God wants us right now, making the exact amount of money He desires for us right now.  I'm saying that purely to show you that anybody can do this.  I've heard wonderful stories of young teenagers and college students sponsoring children.  Anyone can do this!

Some creative things we have done to make sure Nyamawi gets his sponsorship every month include:
  • not spending coins or $1 bills - you would be shocked at how quickly this adds up, we can usually  save a month's worth  of sponsorship every other month or so this way.  Even the children love to round up the spare change they find laying around and put it in Nyamawi's jar.
  • use your bank's easy saver program - it will be called something different at every bank but if you use a credit union or other bank that offers a program to round up your purchases on debit cards, use it to fund a sponsorship.  We use our debit card quite frequently and can usually save about $5 a week or so.  Every purchase is rounded up to the next dollar and the difference is set aside in a savings account.  We set up a seperate savings account for Nyamawi and when we balance the checking account we scoop whatever is in our Easy Saver and put it in Nyamawi's account
  • do some extra jobs on the side - I do some secret shopping and often use that money to fund our sponsorship.  Maybe make crafts and set up at a craft show.  Make a sign with your sponsored child's picture and let people know all of your proceeds will help your sponsored child.  I'm always a stickler for spending money at the booths that are going towards a worthy mission.
What ideas do you have for squirreling away a small amount of money without drastically hurting your family budget?  It's only $38 a month.  You probably spend that much in fast food and takeout pizza every month!  Make 2011 a year of giving, change a child's life.  Sponsor a child today.

Thursday, December 30, 2010

Voices of the Faithful

A 366-day devotional with inspiring stories from the front lines of faith.

"A willingness to go is all they have in common," says Beth Moore, speaking of her friends on the front lines who are spreading the gospel around the world and with whom she collaborated to create this book. This brilliant, 366-day devotional features incredible stories of God's faithfulness in the face of uncertainty and danger, written by hundreds of missionaries worldwide.

With a foreword by International Mission Board president Jerry Rankin and an introduction by Beth, this volume also includes advice on how to hear God's voice, pray for missionaries, and understand the church's and individual's role in missions.

This book is beautiful, weighty, and will help draw your attention to the many needs around the world.  What better way to begin 2011 than to focus our prayer closet on those who put shoes on the Great Commission?

Disclosure of Material Connection: I received this book free from the publisher through the BookSneeze.com book review bloggers program. I was not required to write a positive review. The opinions I have expressed are my own. I am disclosing this in accordance with the Federal Trade Commission’s 16 CFR, Part 255 : “Guides Concerning the Use of Endorsements and Testimonials in Advertising.”


Tuesday, December 28, 2010

Handmade Christmas - Activity Bags

For The Entertainer and my four-year old nephew I made activity bags (since they are made with Buzz Lightyear fabric we call them "Buzz Bags")
I completely, totally, unashamedly copied these off a picture I saw on Facebook.  I contacted the lady to try to give her credit but haven't heard back from her, when I do I'll update it here.  I simply took a sheet of felt and cut fabric to fit it.  I added pockets for crayons.
 
 Then I added a pocket for a small coloring book or notepad.
 On the other side I added pockets with elastic to hold four Hot Wheel cars.
 On the inside I added a felt race track.  I also added a flap with a piece of velcro to hold it all together.

Monday, December 27, 2010

Handmade Christmas - Signs

This year for Christmas I was really inspired to make as many handmade items as I could, using materials I already had here at the house.  Financial reasons played heavily into this decision but also just the idea of cultivating a heart of gratitude in my children and wanting to be a good steward of things we (or others as the case may be) had already spent money on and were just sitting around. 

I came across this great idea on a blog a year or more ago.  When my mom passed away last December I saved what I refer to as "the pie list" off of her refrigerator.  She kept a list of what type of pie every family member liked on the side of her fridge.  I knew as soon as I saw it what I would do with it.  Mr. Steady took the list to the copy store and had it enlarged.  Then I took a picture I no longer liked and a stretched canvas I had purchased previously.  On the large sign for my dad I wrote "Pie fixes everything", a saying from a sign Mr. Steady and I saw on our second honeymoon two years ago.  Then around this I copied, using carbon paper, my mom's pies.  Dad's favorite is blackberry so it went on the center top.  I just kind of moved the others around until they fit.  Then I painted each pie type. 
 I did something similar for my brother, using the stretched canvas.  His favorite was coconut cream so it went first.  I didn't have room for the whole "pie fixes everything" so I just put PIE on his.
I think it's really fun to have a memento of a loved one's handwriting.  I have some of my great-grandmother and grandmother's handwritten recipes.  Even though I never met either of them it's fun to know what their handwriting looked like.

Sunday, December 26, 2010

Candy Land Party - And a Giveaway! Giveaway now closed

 I was so blessed to be asked to host a Candy Land party recently.  Hasbro generously provided me with 15 CandyLand games, a Flip camcorder and a very generous gift card through MyBlogSpark.

I started off brainstorming ideas for the invitations.  I knew I would hand-delivering them so I used a card stock door hanger, adding cute scrapbook paper along with foam stickers from the Dollar Spot at Target (hint: if you are thinking of using a Candy Land theme for a birthday party or other occasion, Christmas time is a great time of the year to buy candy-themed items, I was so pleased with the selection I found).  I added a spiral lollipop and printed invitations provided by Hasbro, adding handwritten details.

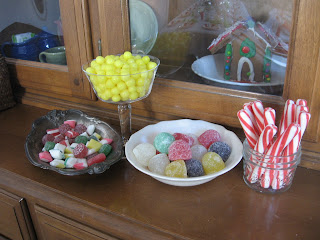
 I then set about decorating the house with - what else - CANDY!  This was so much fun, trying to find all kinds of different candies...some my boys had never heard of or seen before (I guess they are like their momma and tend to stick to the first thing that they like.

 I set out five games to play in the living room and guests were invited to play while they were waiting for other guests to arrive.
Even non-readers can play this fun, iconic game with very little help!

 When the party began I read the story from the inside of the box that takes children through the fun land of Candy and King Candy's kingdom.  We traveled down the rainbow path on a journey of discovery through enchanted lands filled with sweet surprises around every corner. Our first stop was to create delicious treats at the Cupcake Commons to deliver along the way.
 I found the directions online to make candy shaped name tags.  I thought they added a very nice touch, along with the peppermint plates.
 Icing and sprinkles and candy galore was available to add to their cupcakes.  I was very impressed with the creative choices all the children made.

 Next we went with through the Ice Cream Slopes with the Duke of Swirl where the ice cream popsicle molds from BlogSpark and Yoplait made a reappearance.
 We slipped through Gummy Hills and found ourselves at the Gingerbread House where the children all made greeting cards, kits I picked up again at Target. 

 We slid through Licorice Lagoon without getting caught by Lord Licorice and settled down for a reading of the Legend of the Candy Cane.
 After this we trudged past the Ice Palace where everyone was invited to take home a cake pop which were nestled in glasses with sprinkles and sugars.

 Finally we climbed up Chocolate Mountain and ended up at the Candy Castle.  Goodie bags were awaiting there with pencils, a gingerbread cookie, and some candy.  All the children were invited to stuff their bag (and their pockets!) with whatever candy they wanted (sorry Moms!).
 Each family was then invited to take home two Candy Land games, one to keep for themselves and one to give away to a child in need.
I want to again thank Hasbro and MyBlogSpark for the fun and generous party pack - I know how much fun we had planning it and it seemed as if everybody had fun participating.  After all, who doesn't love Candy Land?

And now, it's your turn to own a newly redesigned Candy Land.  To enter, simply leave a comment sharing your favorite memories of playing Candy Land.  Contest will be open until December 27 at midnight. Emily is the winner!

Wednesday, December 15, 2010

Joy Swap

 Monica and Carrie hosted another swap and I was so thrilled to participate.  My swap partner, Michelle, replied when asked what colors come to mind when she thinks of Christmas "red, green, silver, sparkly,"  So I took the sparkly silver and ran with it.  This theme was titled "Joy" so I tried to keep the theme the best I could.

I spotted a really neat large pinecone at a local boutique sanded with silver glitter and topped with other pretty sparkly things.  I recreated this by incorporating a sparkly "Joy", I bought a large greenery pick that had red berries on it, I tore this all apart and made two smaller picks, replaced the red berries with silver, sprayed the pinecones with adhesive and doused them with glitter.  I added some silver bells and a hanger of silver ribbon. 
I also sent three black and cream paper medallions.  I was going to make a garland with them or attach ribbon for hanging on the tree but decided to just include the ribbon and let Michelle decide.
When I was all out of ideas on what else to include I found this great ezine (click on the picture of the magazine) through Jenny Allsorts.  I completely forgot the contents of the swap were supposed to fit in a shoebox, hence the name "Shoebox Swap".  This caused a real glitch in the mailing process (they wanted $45 to ship this box Priority - yikes)!
You simply take a wreath form (instructions said foam but I had straw) and wrap with batting.  Then you layer strips of white and cream fabric.  As you wrap the fabric you can add bits and bobbins such as twigs, doilies, etc.  I made photo copies of Joy to the World sheet music then tea-stained it, cut into strips and pinned on.  Then I added a felt dove, the title from the sheet music, and a brooch.  The only thing I purchased for this was the wreath form.  I had all the fabric (white eyelet, creamy burlap, a cream with white pattern, white felt), batting, the silver twig was left over from the pick above.  My dad's girlfriend found the brooch in a parking lot and I begged it off of her :o)  Thanks Sue!

I added a bar of soap that said "Joy" and a package of Ohio Buckeye candy to complete the package.  Hope you like everything, Michelle!

UPDATE: I hadn't added what Michelle sent me - oops!  It was a really fun box that matched my personality and decorating style perfectly:
A tea towel, an adorable tin snowflake ornament, a really cute snowman head ornament, two wonderful smelling candles, a cute tin sign that says "Ring in the Season" and has rusty bells hanging from it.  A box of Stash Chai Holiday tea - yum, a star ornament (not pictured - it was hanging on the tree already), and my very favorite is that stuffed owl ornament with rusty bell feet - so, so cute.  Thank you Michelle!

Tuesday, December 14, 2010

Dolls

When I saw Monica's dolls I knew they would be the perfect Christmas gift for our two neices, one just turned two and the other will be two in February.  I was able to find the Craft Hope book at our library and it's chock full of very fun projects.  Here is the pattern if you can't find the book.  I scoffed at Monica's suggestion of making the seam allowances smaller but after I broke a seam ripper and stabbed my finger trying to turn those teeny tiny legs out I tossed them in the trash and made bigger ones. 

The doll on the left is for my brother's daughter, I made her a matching outfit for her birthday.  Hope the girlies like them!

Monday, December 13, 2010

Paper Medallion Tutorial

I spotted some gorgeous paper medallions at a local boutique recently and decided I had to have them.  But I have a disease where every time I look at a price tag I think "I could make that for way less than that."   So I went to Hobby Lobby and loaded up on scrapbook paper and then tried to find a tutorial online.  Only problem was I didn't know at the time that they were called paper medallions.  So I finally found several tutorials, all of which looked incredibly labor intensive and also required math which I avoid at all costs.  So I kind of combined a few and came up with my own process.  I started with a sheet of 12x12 scrapbook paper.  I would suggest using double sided if you can find it.  I cut mine into three strips, each 4" x 12".  Then I folded down the edge of each 4" side and glued together to make one long strip 36" long.  I started with Tombo, which I know some people swear by and to be fair mine is several years old but it didn't hold at all.  I ended up using hot glue and I think this made it sturdier overall in the end.
 Then I accordian folded the entire thing.  One of the authors of a tutorial measured every 1/2" and then scored her lines.  Yeah.  Pretty sure measuring falls under math.  I just eyeballed it. 

As an aside, this was the third one I did, the first time I did not glue the strips together first.  The problem with this was my folds were so random that it was really obvious so if you think you're going to fold each 12" strip and then glue together you'll probably want to measure and score.  As an aside to the aside, I did measure and score one of the medallions but a 1/2" fold is very tedious and quickly became a 3/4" fold and I'm pretty sure eventually ended up a 1" fold.  So your paper should look something like this when you're done.
 Take the two ends and glue together so it forms a circle.
 Thread a needle with embroidery floss.
Leaving a longish tail, sew around the top edge about 3/4" in from the top.  Tie the two ends of your embroidery floss together.  Your medallion will end up looking something like a lampshade.
 Cut a circle out of a contrasting piece of scrapbook paper.  I traced around a spool of ribbon then cut with pinking shears.
 Push the middle of your medallion down so it lays flat and glue your contrasting circle in the middle.  Add a ribbon to hang.

Sunday, December 12, 2010

Sixteen Brides

Sixteen Brides by Stephanie Grace Whitson follows the saga of sixteen widows from St. Louis to Plum Grove, Nebraska.  Some of them are running from a haunting past, some are running to hunt for husbands, and still a few others are just looking for a fresh start.  The ladies have been promised the opportunity to homestead in Nebraska and though they are not quite sure what that entails, for most of them it is better than any prospect they had in St. Louis. 

After they arrive in Plum Grove they discover their group leader had an ulterior motive and has promised a cargo of war wives.  When several of the women find this out they part company with the Ladies' Emigration Society and decide to strike it on their own, no matter what befalls them.  The ladies who stay behind end up falling in love with each other and becoming fast and forever friends.  Ella, the strong, sturdy one of the bunch comes up with the idea to homestead on the intersection of four plots of land, with a main living area smack in the middle and four bedrooms that jut out, so that each lady would legally be sleeping on their own land, part of the land contract requirement.  As we witness the ladies build their house, "Four Corners", we also witness them rebuild their lives.  With lots of surprises, laughter and even a few tears, we rejoice as the ladies of Four Corners and several of the residents of Plum Grove find hope.

"Was this how it worked?  A man carried the burden of grief, and for a while it obscured everything else around him, until slowly, the burden started to shrink until it could fit inside his heart instead of blocking out everything else in the world.  And finally, it folded in on itself.  And while it still remained a part of you, and you knew it always would, it made room in your heart for hope.  You woke up one morning and there was no pain behind the enjoyment of sunshine.  Memories stopped slashing their way into your consciousness.  Instead, they floated in, welcome and comforting."  Stephanie Grace Whitson, Sixteen Brides


I received a complimentary copy of this book from Bethany House Publishers, all comments and opinions are mine.

Saturday, December 11, 2010

Crunchy Crazy Caroler Cookies


Say that five times fast!  I had clipped a picture out of one of those recipe idea booklets years ago of these cookies.  Sadly the page I clipped didn't have any markings as to where it came from so I can't give credit where it's due.  Tonight was our Christmas caroling and we always gather together when we are done for chili and snacks.  So I knew these cookies would be perfect.  You simply make sugar cookies, cut them into circles, cut a mouth using a straw (or the bottom of a funnel), then bake and decorate.  You might have to re-shape the mouth when the cookies come out of the oven.  I found a medicine syringe worked great for the warm cookies.

I was decorating this cookie, after having flopped the blond hair color I was going for (The Reader said it looked like boiled eggs yolks - you know the overcooked greenish gray ones?) and making more of a gray color.  I decided to have a little, okay a lot of fun and make one look like a man at our church.  I added a beard to another one.  Well, the boys just thought that was all kinds of silly and egged me on.  Suddenly our children's choir turned into a whole church choir.
 Then I remembered all the beautiful colors of skin we are so very blessed with at our church and decided to try some gingerbread dough as well.  This is one of the families at church with their newly adopted children.

 One of our elders and ministers, hee hee.
 And Mr. Steady, even though the eye color is wrong (I think Brother Keith's eyes are wrong too, I think he has blue eyes?)
I can't get these next two pictures straight, sorry!  You'll have to turn your head to see them :o)

Great fun, good times.  They are singing
"He rules the world with truth and grace, and makes the nations prove the glories of His righteousness, and wonders of His love, and wonders of His love, and wonders, wonders, of His love."
Hey, they're my cookies, I can make them sing whatever I want, no?

Gifts of Compassion

Do you have a persnickity person on your Christmas list?  Or an overly gracious person who wants nothing on Christmas morning except to "spend time with my family?"

Consider giving a Gift of Compassion in their name!

Tired of all the commercialism of Christmas and want to rein your family back into focus? I love Ann's children's ideas of giving all the gifts to Jesus.

Choose a Gift of Compassion as a family and pray for the recipient!

What is Gifts of Compassion?  An on-line catalog of gift alternatives for friends, family and clients. No crowds, no lines, no stress - just a gift that will help make a difference in the life of a child living in one of the poorest communities of the world. These gifts help provide clean drinking water, medical treatment, disaster relief, food supplies and much, much more for Compassion-assisted children and their families. Meet real needs and bring real joy with a Gift of Compassion.


Gifts include mosquito nets, soccer balls, chickens, goats, water filters, farm equipment, clean water and more. Gift prices range from $10 to $5000.

Thursday, December 9, 2010

Fabric Flower Pins

Several of you have asked me how to make my fabric flower pin - here is the tutorial I used.  Don't drive yourself crazy making them perfect - they are supposed to be shabby and fun...make them yours!

Sunday, December 5, 2010

Take a Bath

Your job to keep your frame of mind peaceful and your focus on Jesus this week is to take a hot bubble bath.  And aren't I blessed, it's my job too!  I can hardly wait until Tuesday night!

According to Donna Partow, in her book Becoming the Woman I Want to Be, "soaking in a hot bath that contains 1 cup of dead sea salts, 1 cup of epsom salt, 1 cup of regular sea salt, 1 cup of baking soda and a few drops of lavender oil will help your body release...unwanted toxins (you can substitiue these ingredients with 2 pounds of regular sea salt and 2 pounds of baking soda). You need to stay in the hot water until it cools, no longer than 30 minutes. Be sure light a few candles and play your favorite inspirational music to stimulate your heart and soul! Be careful when getting out as you may feel a bit light headed which signifies the detoxifying work has been done!"

I have incorporated a bath as prescribed as above before fasting and it is wonderfully relaxing.  I must admit I have fallen asleep in there a time or two.  I love to turn out all the lights and light a few candles.  I don't love the idea of taking my Bible into the tub with me (what would I do if I fell asleep and dropped it - yikes!) but I think I will make a copy of Matthew 1-2 and Luke 1-2 to meditate on.

Make sure you take time for yourself and, more importantly, for Jesus this week!  For more great ideas and to follow along with Courtney's Peace on Earth December Challenge or to link up, visit her blog.


Thursday, December 2, 2010

Peace on Earth December Challenge


I'm joining Courtney in her Peace on Earth December Challenge.  Let's keep our focus on Jesus this month!  It's all too easy to get wrapped up (pun intended) in the gifts and shopping, cooking and get togethers.  Those things are all great if we keep Jesus as our guest of honor.  Won't you join us?  Start by lighting a candle every day this week in a main room of your home.  Every time you see the candle burning, say a prayer for your family and loved ones.

As you prepare your home for Jesus' birthday party, what are you doing to prepare your heart?  Our family is reading Jotham's Journey and accompanying devotional nightly.